An Oil based finish is a fantastic option for household timber furniture. It’s quick, simple, low odor, and when maintained correctly, extremely resilient to wear. One of the most common styles of oiled furniture is Mid-Century Modern (MCM). Furniture manufacturers at the time often opted for an oiled finish as it was much easier and cheaper that the alternatives, that paired with the satin finishing becoming increasingly popular (over shiny French Polish), it was a no brainer! But unfortunately, as time passed, Grandma and Granddads once captivating coffee table, sideboard, TV chairs, and other furniture items slowly succumb to the constant wear of coffee mugs, stains, greasy elbows, and the ungentle nature of filthy children. Slowly but surely, over many decades, the oiled timber surfaces started to show its scars. Wear and tear on antique furniture of often considered desirable if it fits the characteristics of a “tasteful patina”, but the opposite goes for Mid-Century Modern. With the intention of being sleek, simplistic, and modern, a worn finish can be make or break even for the rarest Mid-Century pieces.
If this sounds all too familiar, you will absolutely love what’s next. An oiled timber finish may not be as resilient as modern polyurethane, but it is extremely forgiving. In my opinion, a forgiving finish is one of the most important characteristics to consider when choosing a timber finish. This especially applies to the less experienced woodworker. Sloppy mistakes, scratches and more will virtually disappear with the addition of a new coat. Using oil is almost foolproof, as long as you don’t spill it on the carpet you really can’t go wrong!
These 5 steps will teach you how to restore the finish
STEP 1 – IDENTIFYING THE FINISH
Although many MCM manufactures used oil, some chose alternatives. Sometimes the satin finish is a toned lacquer made to look like oil. To test if the finish is oil or lacquer, simply apply some White Spirits (Mineral Turpentine) to a white cloth and rub the wet cloth on an inconspicuous area of the furniture, the rag will begin to discolour as the oil breaks down, and if it doesn’t, it’s lacquer. Now, the results of this test may vary as there are simply too many variables for it to be 100% accurate, but it’s better than nothing. If the result of the test determine a lacquer finish, you can still oil the timber if you sand the finish completely off.
STEP 2 – CLEANING THE SURFACE
Cleaning the surface before sanding and oiling is straight forward but necessary. Many years of built-up grime will continuously clog up the sandpaper, making step 3 (sanding) very laborious. Simply wet some steel wool in in Mineral turpentine and start scrubbing! It shouldn’t take long before the turps has dissolved both the grime and oil. Wipe away the excess moisture with a clean rag and wait for it to fully dry before moving on to step 3.
STEP 3 – SANDING THE SURFACE
Sanding away the scratches and remaining dirt (if any) will ensure an imperfection free finish. Using a cork block, and travelling with the grain where possible, gently sand the surface starting with 180 grit paper. The 180 grit will be coarse enough to remove a decent layer of timber, revealing the fresh timber underneath. Be very careful not to sand through veneer, this mistake is almost irreversible. Work your way through the grits, finishing on 400. There is absolutely no benefit to going higher than this, other than building a super strong forearm.
TIP - In most cases, the old oil must be COMPLETELY REMOVED because new oil simply wont bond resulting in a blotchy finish. Make sure you sand all the way back to bare timber.
STEP 4 – OILING THE SURFACE
There are many different types of oil that can be used, but the following information applies to Tung oil (the main ingredient of Danish oil). Tung oil is an air-drying oil so technically it’s not necessary to add any solvents or drying agents, but diluting the oil with Mineral Turps will greatly increase its “biting strength” and reduce the drying time between coats. The mineral turps allows the oil the penetrate deeper into the wood. A solution of half Tung oil and half mineral turps is recommended.
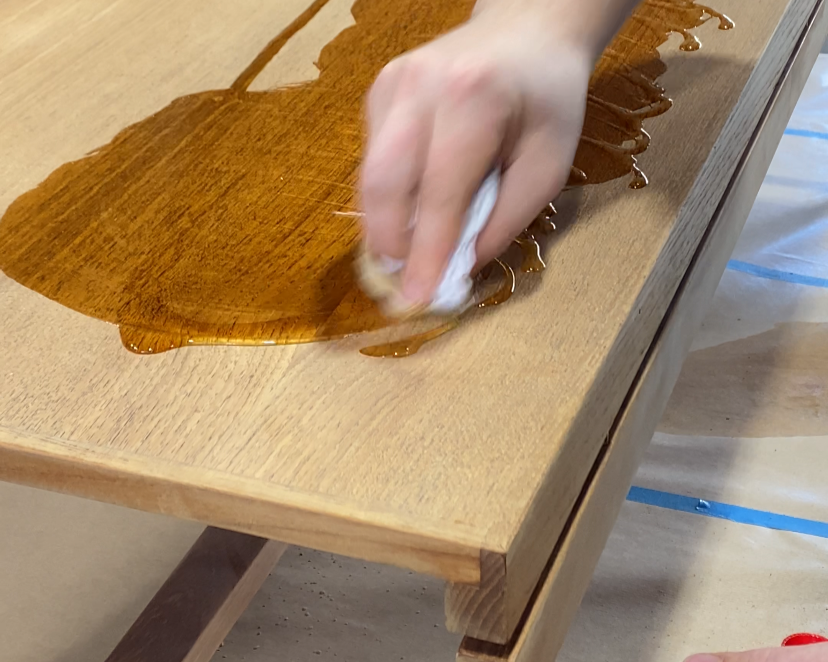
Using a rag or paper towel, start applying the oil in circular motions. A decent amount of oil can be absorbed on the first coat depending on the porosity of the timber. Allow the surface to be saturated with oil for around 30 minutes. Then wipe off the excess with a clean rag. Make sure you keep wiping until there is no more oily residue and the surface feels dry to touch, if there is any excess oil on the surface it will take much longer to harden, if at all. Usually, it takes 24 hours for Tung oil to fully harden, but this can vary.
Theoretically, you could stop here but additional coats simply means additional protection! Apply more oil, wipe it off, wait 24 hours for the finish to harden, and repeat until satisfied.
TIP - Not removing the excess oil properly can result is much longer drying time, and in some cases a "wrinkly finish". Even when you think its completely off, its still good to check using a clean white rag. Buff the surface firmly.
STEP 5 – ENSURING LONGEVITY
Like all oil finishes, reapplication in the future is recommended. Depending on how the surface is used and cleaned, a Tung oil finish can last anywhere from 6 months to a few decades. For high use items like dining tables, you can expect to re-coat every 12 months. Again, this isn’t completely necessary, but it will ensure your table always looks its best.

